Post Process Volumes in Blueprints
Overview
Post process volumes, often used in map creation, are not strictly limited for use in maps. They can be used in buffs, etc. In addition, Post Process Volumes can be added to blueprints in the form of a Post Process component. This quick tutorial shows how you can create a simple Post Process effect to a structure blueprint. We'll be creating a tree that can be placed in the world with the benefit of providing a cooling effect (buff); players standing under the tree branches, receive the buff, and also see the effect of standing in the shade.
This tutorial will cover the basics of adding a Post Process Volume to your blueprints, through a simple, place-able structure.
Preparation
- Create a new structure blueprint (can be a child of any Primal Structure BP)
- Add a static mesh, a tree from the core game assets, or whatever static mesh you want to use.
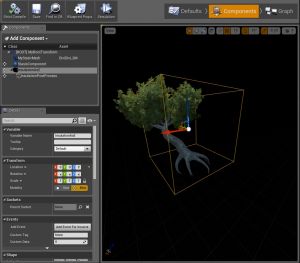
- In the Components section of the blueprint, use the "Add Component" dropdown, and type in "Post Process" -- this will provide you with the component to add to your blueprint. By default, the post process affects players' entire view of the world, we see this every time we dive into water volumes. The Post Process effect disappears, when we leave the water. This is initially useful for creating your post process effect from scratch, since you'll be able to see, in full, the effect as it's applied to your view in PIE.
- Add a Box Component, following the same process in Step 3, type in "Box". This is needed in order to limit the scope of the Post Process effect, since, by default, the Post Process component does not have a bounding box to define the limits of its effect.
- Define some basic settings for your Post Process, such as dimming the light to simulate shade.
- With the new Box component added, parent your Post Process component to your Box component, then define the size of your Box component, adjust its position as needed since it will be doubling as a trigger box to drive the buff and post process activation. You won't see an immediate effect, since we still haven't set the Post Process effect to make use of its new bounding box.
- Next, with your Post Process selected, type "Unbound" to locate a checkbox labelled, "Unbound". Un-check it. By default, this will be checked; and as the name implies, will not be restricted by any bounding box. Once unchecked, you'll see your Post Process effect disappear in PIE (if you've PIE in your view). This is the desired effect for this tutorial.
- Drag and place your new Primal Structure into the test level in PIE; test the Post Process effect by having your player enter and exit the bounding box around your static mesh.
And that's it.
If you want to complete the effect, you could apply a buff using the Box component as a trigger.


